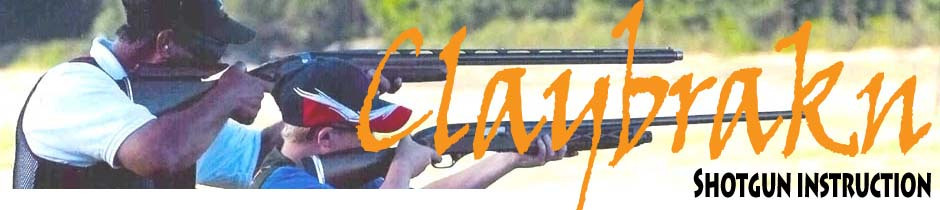

Claybrakn offers this series of informative and instructional shooting articles written by Frank for all levels
and disciplines of shotgun shooters. Frank's articles have appeared monthly in various club newsletters across the country, they have also appeared in Bird Dog &
Retriever News and periodically in Shotgun Sports, America's leading shotgun magazine.
Read the latest Claybrakn article below and other helpful articles on your right. Enjoy!
Latest Articles...
(Scroll on down to find...)
*The Biomechanics of Shooting
*Skeet Shooting 101
*Trap Shooting 101
*Shotshell Reloading
*Shotgun Chokes
*Keep It Clean
The Biomechanics of Shooting (7/15)
by: Frank Neumayer
Biomechanics is the study of the action of internal and external forces on the living body, especially on
the skeletal system, which includes the analysis of motion. When we’re engaged in tournament clay target shooting (Trap, Skeet, or Sporting Clays) it’s crucial that we apply the proper or
correct biomechanics with regard to our posture, form, and movement. This certainly helps us to endure the least amount of body stress and fatigue as we engage in lengthy tournament
situations. As I work with students, from novice to advanced, one of the first things we review is their “most comfortable shooting position”. From that we’ll then make whatever
adjustments or corrections are needed so as to incorporate the proper shooting form and posture.
I’m not planning to go deep into the biomechanics of the human body here, but when we shoot competitively for long periods of time, we need to make certain that we’re
properly engaging our legs, back, neck, shoulders, and arms in the performance of every single shot. When we don’t use the proper form or posture when shooting, stress, fatigue, aches, and even
pain, can set in and our accuracy or performance will suffer. What I hope to do here is simply make you aware of the importance of proper set-up and positioning of your body for every shot, and
to provide you with some basic ideas and techniques that can help you analyze and improve your shooting comfort, accuracy, and endurance.
Let’s start with your Arms, Neck, and
Shoulders: Competitive shotguns will weigh on average about 8.5 pounds. Obviously, we need a certain amount of basic muscle strength to simply swing and control the
shotgun comfortably and accurately. However, when we add additional stress to the muscles because of improper balance or by over-gripping or tensing-up on every shot, we induce unnecessary
fatigue which robs our endurance. Here are a few things to keep in mind as you mount the shotgun. Your forend arm and hand are what guide and control the elements of your swing.
Don’t over-extend your arm on the forend wood; keep your grip near the mid-position point as much as possible. Don’t flatten the strength triangle formed by your bent arm and the shotgun.
Relax the tension in your wrist and hand but maintain a firm and comfortable grasp. Make certain to keep your elbow relaxed, yet in a supportive and weight-bearing position, slightly beneath
the shotgun.
To reduce fatigue in your stock-gripping hand and arm, simply wrap your thumb over the stock and keep your wrist straight and in-line with your forearm as much as
possible. Some shooters like to keep their elbow out at 90 degrees; this is an unnatural position and can induce additional stress in the arms and shoulders. I recommend you keep your
shoulder relaxed and your elbow at around a 45 degree angle. This is a more natural position and will actually allow for better gun support, comfort, and control. As you start your gun
mount, keep it level with the ground and un-canted. Move it outward slightly as you raise it to the level position (never above eye-level), and then pull it back gently into your shoulder
pocket. When you raise your shotgun above the eye-level position, you’re unnecessarily interrupting your field of vision and momentarily breaking your mental focus, which should be out into
the breaking zone. As soon as your gun touches your shoulder, start moving your face down toward the comb. Be sure to maintain slight backward pressure on the stock into your
shoulder pocket, it should be firm but not tense or over-stressed.
Now, move your head slightly forward and down onto the stock to achieve
the proper eye/rib/bead/barrel alignment. This is where proper gun-fit and gun set-up becomes critical. Use only mild pressure as you lay your cheek on the comb of the stock to achieve
eye alignment, don’t force your face hard onto the comb. Applying to much pressure can result in unnecessary pain (bruising) and vision distortion as you prepare for the shot. Don’t hunch
your shoulders; focus on keeping them relaxed and your neck straight and comfortable. You should practice this whole gun mounting and muscle relaxing routine so it becomes one fluid motion and
exercise as you prepare for each and every shot. You can also keep your shoulders relaxed by slightly forcing your shoulder blades gently down and together in back. This enables all of
your shoulder (rotator cuff) muscles and tendons to properly respond as needed throughout the shot process.
Now, let’s focus on your Hips, Waist, and Lower Back: As you lean forward putting slight pressure on your lead foot (which is about
60% of your body weight) keep your low-back and hips relaxed and in straight vertical alignment. In Skeet, I’ve noticed a number of shooters that go into a slight crouching position just prior
to calling for the target. Some believe this makes them more focused and aggressive, or that they see the target better? I believe this just puts a lot of unnecessary stress on the legs
and low back, which invites more aches, pain, and fatigue. As you place weight forward on the lead foot, be certain to maintain good balance and ground contact with both feet. Always set
your foot position for the desired target break point. Then, rotate at the waist and face your upper body toward the desired gun hold point. Remember, to maintain your “Comfortable
Shooting Position” toward the desired target break point. As you call for the target, slightly tighten your stomach muscles as you unwind for the shot, this helps with strength, stability, and
control of movement.
Finally, let’s talk about your Legs, Knees, Ankles and Feet: Many
shooters will use only their upper-body when taking the shot. They’ll use their legs (including knees, ankles, and feet) only for support and stability. That’s certainly important; but
applying proper shooting technique involves the use of your legs to drive the upper body toward, and through the target. This is especially true for skeet and sporting clays shooters as they
will track and swing through the many angled targets presented. Even though trap shooting has less body movement, you’re still using your legs to provide a slight push toward the target.
By making minor adjustments in my ankle and foot positions, I’ve been able to reduce or eliminate hip, low-back, and knee aches and pains. As most shooters set-up for the shot, it only takes a
few seconds to recognize and analyze the bio-feedback (or messages) coming from your body. The key is to pay attention and be open and receptive to what your body is telling you, then to make
the slight adjustments necessary to relieve any pressure, tension, or stress.
Hopefully, this brief essay will give you some awareness and insight as to the importance of proper and correct shooting form and posture. It may also provide you some
simple methods to correct those bad habits you may have adopted over the years. Awareness leads to improvement! When you set-up for every shot, simply pay attention to what
your body is feeling; your joints, muscles, nerves, and tendons. With sensitivity and awareness, you should be able to focus instantly on relaxing or relieving that tension or stress that can
ruin your success. Understand that your body is a very complex and delicate biomechanical machine, and for peak performance it’s crucial that you learn to take care of it properly. Mental
and muscle fatigue kills performance! Just before every shot on every post or station, if you simply take a moment and realizing what your body is telling you, you’ll be able to make those
immediate and necessary corrections so you can stay relaxed and focused to break every target every time.
Skeet Shooting 101 (2/14)
by Frank Neumayer
A little more effort is needed to learn how to shoot Skeet
properly, but after you figure it out it’s actually easier to master. The reason I say this is because the target presentations and speed are always the same. At every station the shooter will see
the same high-house, low-house, or true-pair of targets. The only thing that changes is the shooter’s perspective as they move from station to station around the field. To start with, you need to
understand the concept of the game and how it’s played. All of the popular clay target games have been designed to simulate various birds or duck hunting situations.
Think of Skeet shooting as a simulation for chukar, dove, or pigeon hunting. This is where you have small, fast, close-in, crossing birds, traveling quickly for short
distances. All the targets are set to travel at about 45-50 mph, at a height of 15 feet, and a distance of 60 yards. The longest shot in Skeet is only about 22 yards. That’s why a small shot size
(#9’s), and open pattern chokes (IC or Skeet) are used. Because Skeet is such a fast and close-in game, it can be shot using all gauges of shotguns (12, 20, 28, and 410). In the U.S. a 20 gauge is
more than adequate for Skeet, but in Europe the 28 gauge has long been the most popular.
At every station in Skeet, shooters will see incoming, outgoing, and crossing targets. On stations #1, #2, #6, and #7, shooters will face 4 targets: 1 single high-house
outgoing target, 1 single low-house incoming target, and a crossing pair. On stations #3, #4, and #5, shooters are presented only 2 targets; a single high-house and a single low-house crossing
target. In the center of the field at Station #8 targets are simply reactionary shots. Shooters will see one single incoming high-house target and one single incoming low-house target. There are 25
targets per shooter per round, with 5 shooters per squad.
Each shooter will take 4 shots at station #1, #2, #6, and #7; and 2 shots at Stations #3, #4, and #5, and #8. That equals 24 targets, and the 25th target (the “option”
target) it is taken at the shooters first miss in the round. If the shooter goes the entire round without a miss, the 25th target is taken as a second low-house target at station #8. The first
shooter on the squad will always lead-off and once all 5 shooters have taken their shots, the squad will then move to the next station. You pay for 25 targets, but to cover breakage clubs usually
allow for 27 targets to be thrown per shooter per round.
There are five basic shooting elements to every shot in Skeet. These elements are (1) Set-Up/ foot position, (2) Gun-Hold, (3) Eye-Hold, (4) Lead, and (5) Break-Point. First,
on every station the shooter “Set-Up” for the proper break point on each target. In Skeet we use the “sustained lead” method of gun placement. This means the gun is always out in front of
the target from the “call” thru the “break”. Second, while staying along the flight path of the target, the shooter will establish the proper “Gun-Hold” point. Third, with the gun mounted and cheek
snug to the stock, the shooter will determine the proper “Eye Hold” point. Once all these shooting elements are in place, the target is then called for.
For example: On station 3 high house target, your Break-Point will be along the target flight path and close to the
center stake or mid-field. Your Gun-Hold point will be about 1/3 of the distance from the high-house window to the Break-Point, and your Eye-Hold point will be about half-way in-between the
high-house window and the Gun-Hold point.
Shooting Skeet is all about movement, rhythm, and
timing. As you can see with all the factors involved that Skeet can be a little more difficult to learn, but all of these steps will flow smoothly together and become fluid motion as you continue to
practice and gain experience. Determining the proper amount of “lead” is critical in Skeet, and all shooters see lead differently. Out on the target, my 3 foot of lead may not be the same as your 3
foot of lead? So, as a rule-of-thumb, start out by looking at the station number you’re standing on, and then use that number (in feet) as a starting point for the amount of lead required on all
targets on that station.
For example: On station #1, give the targets 1 foot of lead. On station #2, give the targets 2 foot of lead. On station #3, give
the targets 3 foot of lead, and on station #4, give the targets 4 foot of lead. On stations #5 thru #7, simply use the mirror image of these leads. Use 3 foot for #5, 2 foot for #6, and 1 foot for
#7. On station #8, very little lead is required, and both shots are quick and reactionary. Station #8 can be somewhat difficult, so it may take some extra time to
perfect.
Usually, when a shooter misses a target in Skeet, they’ve shot behind it. So, if you find yourself not hitting the targets well, or just barely taking the back-ends off,
mentally add one more foot to your lead. That should be enough to move your pattern forward and into the targets. Practice is the key word to becoming proficient at shooting any of the clay target
games. Again, Skeet can be a little more difficult to learn, but once you figure it out, it may easily become your favorite clay target game to shoot.
Skeet shooting has been around for over 100 years as an International, and Olympic sport. Not only is it great family fun, but it will certainly keep your shooting skills
sharp and ready for any upcoming bird hunting season. If you want more in-depth details on how to properly shoot Skeet, review my article “The Skeet Advantage”. Now, go out and
have some fun!
Trap Shooting 101 (1/14)
by Frank Neumayer
Learning to shoot Trap is not difficult, but first you need to understand the game and how it’s played. All of the clay target games were designed to simulate various
bird and duck hunting conditions. Think of Trap shooting as a simulation for pheasant hunting. This is where you have a large heavy bird, rising only so high, and traveling at slower speeds away from
the shooter for a fairly short distance. To simulate average bird flight, the targets can fly anywhere within a 34 degree spread (17 degrees R or L) off the centerline of the field. At ten yards in
front of the Trap house the targets will fly at about 9-10 feet high. The targets will travel outbound at around 43 mph, and will rise about another five feet as they reach their apex before dropping
to the ground at about 50 yards out.
Just like in hunting, you’ll want to shoot at a rising target which puts the actual pattern point of impact (POI) at about 30-35 yards out in front of the shooter.
There are 25 targets per shooter per round, that’s five shots taken at each of the five posts or shooting positions. Each shooter will shoot one target at a time in rotation, with the shooter on post
one leading-off. Once five shots have been fired at a post, all five shooters will rotate to the next post on the right. The post one shooter will always be lead-off, and this will continue until all
shooters have shot five shots at each of the five posts. You only pay for 25 targets, but to cover breakage most clubs allow for 27 targets to be thrown per shooter per
round.
There are five basic elements to every shot in Trap shooting. These elements are (1) Set-Up (or foot position), (2) Gun-Hold, (3) Eye-Hold, (4) Lead, and (5)
Break-Point. Every shooter needs to determine their comfortable shooting position or Set-Up. On every post, you will Set-Up based on the Break-Point for the worst possible (angled) target the machine
could throw you on that post. Now, without moving your feet, swing back and set your Gun-Hold point at about 24”-30” over the trap house lid. On posts #1 and #2, hold about 12” in from the (left)
corner of the lid, and on posts #4 and #5, hold about 12” in from the (right) corner of the lid. On post #3 for a (RH shooter); hold slightly to the right of the centerline of the lid, for a (LH
shooter); hold slightly to the left of the centerline. For your Eye-Hold point, your eyes should be looking straight down the barrel or rib of your shotgun and focused at about 35-40 yards out into
the breaking zone. Now you’re ready to call for the target.
As the target appears, don’t move anything until your eyes have locked-on the target and you see it clearly. Once the target is in sharp focus, with control, move your
gun smoothly up and through the target and determine the amount of lead required. Once you have the proper lead established, then you can take the shot. Once the shot is fired, keep your head down
and locked into the gun, watch the target break, and then follow-through or chase the break. Don’t be moving your feet around after every shot. Be sure to maintain the same Set-Up, Gun-Hold, and
Eye-Hold points for every shot on that particular post. Always practice safe gun handling and shooting etiquette, and always show courtesy and respect to the other shooters on your squad. Trap
shooting takes discipline, focus, and practice to be successful, and as your confidence increases, so will your fun!
Shotshell Reloading (1/14)
by Frank Neumayer
New shooters have often asked me if I thought
shotshell reloading was worth the effort? My answer usually starts by asking them a few questions of my own. First, I ask how they value their personal time and energy. Second, do they have the
time and patience necessary to take-on an on-going and tedious project like this? Third, are they willing to make the monetary investment in equipment and components needed to get started, and then
to sustain an on-going effort? Forth, are they willing to continually educate themselves on the technical knowledge of formulations and ballistics needed to be successful? Basically, what I’m trying
to find out is if they truly understand what’s involved in reloading, and are they willing enough to take on such a project without getting impatient or quickly frustrated.
Usually, shooters think only about the monetary savings involved with reloading, but you have to view that savings in the context of everything involved. Yes… you will save
money on each box of shells you reload, but it’s relative to amortizing the cost of your equipment over time, along with the costs of components and the value you place on your own personal
time. A simple progressive 12ga shotshell reloader will cost you around $350.00. When you add to that the basic components of shot, powder, wads, primers, and hulls for 1000 initial
reloads, plus the few additional accessories required, your start-up costs will add-up to nearly $1000.00. Currently in WA, lite target factory loads will cost you around
$7.50/box with tax. To reload a comparable lite target load, your cost will be around $5.50/box. The heavier hunting and handicap factory loads will cost you about $15.00/box with tax, and comparable
reloads will run you $6.50/box.
Also, the investment depends entirely on how much shooting you plan on doing! Just to
recoup the cost of your reloader alone, you’ll need to reload nearly 5000 rounds, or 200 boxes of shells. In my opinion, if you don’t shoot at least 300-500 rounds per week for both practice and
competition, and you don’t have at least 3-5 hours per week to dedicate to reloading, then it’s not going to be worth the effort. For me, I actually enjoy reloading, especially when I’m formulating
new or unique loads for shooting competitive Trap or Skeet. I also reload because I want to be assured of consistent accuracy and performance. Again, shotshell reloading will
certainly save you money, especially when it comes to reloading the Skeet shooting sub-gauges of 28ga and 410ga. However, it’s going to require a sizable commitment on your part, coupled with
patience and adequate volume in order to recoup your investment and to realize an on-going savings.
Shotgun Chokes (1/14)
by Frank Neumayer
In the begining, shotguns came with fixed choke barrels. Regardless of gauge or configuration, shotgun barrels were designed and manufactured to provide the shooters with an optimal and
effective shot pattern of about 24”-30” in diameter on the bird or target at varing distances. You could buy your shotgun with barrels machined in Cylinder or Skeet for close-in 20-25
yard shots; Modified and Improved Modified for those 30-40 yard shots; and Full constriction for those longer 45-55 yard shots. If you bought a single barrel shotgun, normally
you would buy it with a Modified or Improved Modified all-purpose barrel. If your shotgun came with two barrels, you would want a Modified barrel for that first, close-in shot, and a Full barrel
for that second, farther-away shot.
The last 3”-4” of the inside diameter of the barrel is what actually determines the shape, density, and spread of the shot pattern as it leaves the muzzel of the
shotgun. Based on the type of hunting or shooting that was expected, barrels were machined with varying constrictions to either open-up or tighten-down the pattern of shot
as desired. For example, barrels with open Cylinder or Skeet chokes were purchased for those close-in shots on fast moving and crossing birds like pigeons or doves. On the
other hand, Improved Modified or Full choke barrels were desired for those long-range pheasant, or high-flying duck and goose hunting shots.
Today, when you buy a new shotgun, it will usually come with three (insertable) choke tubes, Cylinder, Modified, and Full. These (screw-in) chokes are usually around
3"-4” long and are color-coded or distinctly marked according to their constriction. Every shotgun manufacture will offer a variety of choke tubes for their own shotguns. Plus, there are
numerous excellent after-market choke manufacturers as well. For me, I think this market has gotten a little carried away with the myriad of sizes, types, and styles of chokes available. However,
it’s a proven fact that the use of choke tube inserts has greatly improved and enhanced the versatility, value, and performance of all shotgun types both on the range and in the
field.
Keep it Clean! (8/12)
by Frank Neumayer
Many of my students are new to shotgun shooting, and lately several have asked me about what methods or frequency they should use for cleaning and maintaining their shotguns? I answer them by briefly going over some of the basic and routine tasks they’ll need to adopt in order to keep their guns safe, dependable, and in good condition. As a result of this question, and on a number of occasions, I’ll find student shotguns with little or no lube on any of the mating metal parts. Based on this experience, and before we start any session, I’ll do a quick check to make certain that all student shotguns are clean, lubed, and functioning properly. This situation also made me realize that I needed to write all this down so my students would have something to reference before, and apply after, their training session.
As boys growing up on a small farm in rural Oregon, my brother and I were shooting rifles, pistols, and shotguns at an early age. Our dad taught us not only how to handle guns safely and to shoot well, but also the importance of keeping our guns clean and ready to go. I can still hear him say “Take care of your gun and it will take care of you”. My brother and I were taught that good gun maintenance is simply a part of responsible gun ownership and we made it standard part of our shooting and hunting routine. I’m sure there are many different thoughts and methods out there on how and when to clean your guns, but all I can do is convey to you what I was taught, and that has served me well for many years. I’m going to focus my comments on shotguns, because as clay target shooters we’re usually firing many more rounds per day or per week than with most average rifle and pistol shooters.
Basically, there are two types of gun cleaning methods that I use. The first is what I call “Dry Cleaning”, and the other (more involved method) I
call “Wet Cleaning”. I rarely shoot less than 100 rounds each time I take my shotgun out to the range. Every time I’m finished shooting I take a few minutes and dry clean my shotgun.
First, by pulling a “cleaning snake” through the barrels, and then by wiping down all metal and wood surfaces using a lightly oiled cloth for the exposed metal parts, and a silicone cloth for the
wood. This removes any dust, dirt, shot residue, hand and face oils, and especially fingerprints off the metal - which can cause corrosion. I then spot lube all the mating metal surfaces, and wear
and hinge points. If the shotgun I’m using has choke tubes, I remove them and thoroughly clean and wipe them down. I also make certain I completely clean the barrel threads before I lube and
re-insert the clean choke tubes. The goal is to have my shotgun cleaned, lubed, and all ready to go for the next time I head to the range or the field.
If you shoot a Semi-automatic shotgun they will take a little more cleaning effort. Be sure to remove the forearm and wipe down all the major components with a clean dry cloth. Then
prior to assembly, wipe down all the metal components with a lightly oiled cloth leaving the entire assembly lightly lubed - but fairly dry. The thing to remember is that you don’t want to leave any
of the action components in a “wet” condition. Your Semi-automatic works off the gases expended from the fired shells and a wet assembly will simply collect spent particles and soot more rapidly, and
this residue or build-up can quickly jeopardize or stop the proper functioning of your shotgun’s action. If possible, remove the trigger assembly and brush out any and all loose particles then wipe
it down with a dry cloth. On reassembly, a light spray lube is all that’s needed, and for the same reason mentioned above, don’t leave your trigger assembly or receiver components to wet or
over-lubed.
After about 500 plus rounds through my gun, and depending on the shooting conditions I’ve exposed it to, I’ll do a “wet cleaning” of my shotgun. For this effort, I disassemble the shotgun down to its major components. Relative to the specific make and model of the shotgun, I’ll remove the forearm, barrel-set, bolt, slides, and/or trigger assembly, as well as remove the stock to expose the receiver. (Note: on your cleaning bench, keep your wood separate from your metal parts, that way you won’t end up with a nice ding in your stock or forearm while handling the metal receiver or barrel-set.) While cleaning these components take the opportunity to thoroughly inspect each for damage or wear. I clean each component separately in a pan with a light solvent (kerosene). Use a cleaning brush to remove any particles, then blow dry with compressed air, or simply wipe dry with a clean cloth. Prior to assembly, thoroughly apply a light spray lube to all components. Again, and especially with Semi-autos, don’t leave an excessive amount of lube on the component surfaces that will collect shot residue or build-up.
As far as cleaning products go, there are a number of excellent manufacturers out there that offer basic to advanced shotgun cleaning kits. You can easily find these kits and products on-line or at your local Sporting Goods outlet. The kits normally include everything you’ll need to get started out correctly. Along with detailed instructions, every kit will include the necessary rods; patches; brushes; tips; treated cloths; wipes; tubes of grease; as well as small bottles of gun solvent and oil… everything you’ll need to keep you shotgun functioning properly and in great shape. Outers, Hoppe’s, Rig, and STOS are just a few of the excellent cleaning products available. I would refrain from using items like automotive brake cleaners or other harsh solvents on your shotgun or firearm. I’ve seen beautiful wood and metal ruined by using some of these products, so I strongly recommend you play it safe and stay with the products that have been specifically developed for firearm maintenance.
Think of your shotgun as a complex mechanical device (with many small moving parts) that you use in the performance of a precision task. With that mindset, it should be easy to adopt the right attitude and perspective for proper gun care, inspection, and maintenance. There are many different thoughts out there on how to properly clean your shotgun, and on what products will work the best? Without question, good gun maintenance will not only retain your guns function, but its beauty, and value for as long as you own it. Again, these are just my ideas and methods which have served me well for many years. Here’s the point… you want to be confident your gun will function properly for every shot you take! Plus, you want to know your gun is clean and ready to go the moment you decide to head out to the field or range. Take pride in what you own, and remember “Take care of your gun and it will take care of you”.
If you’d like more information visit my website at www.claybrakn.com , or if you have a specific question send me an email at claybrakn@msn.com and I’ll do my best to get it answered.